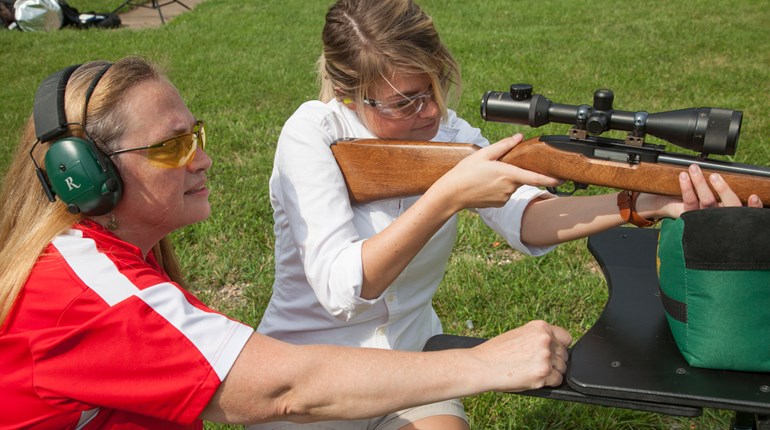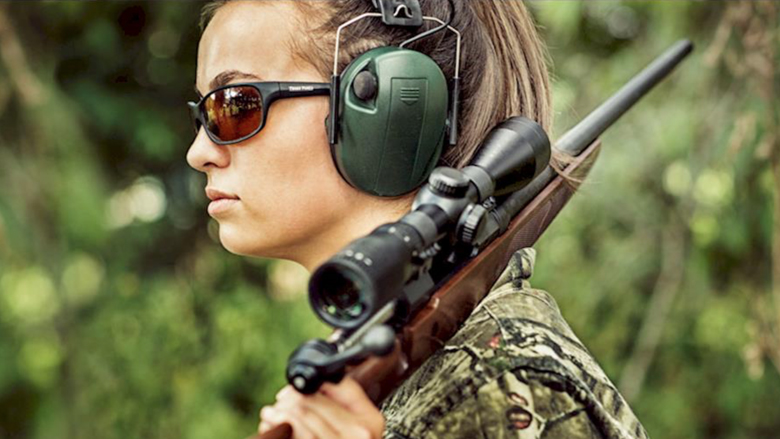
You’re probably aware that if you carry a handgun, you need to be safely practicing your draw with an unloaded firearm. This is important, because if you can’t get your gun out of the holster and into a firing position quickly and efficiently at the moment you need it most, the consequences could be devastating.
A good, safe draw is important at the range, too, assuming your range allows you to draw from a holster. A proper draw sets you up for a proper shot, and this only happens through practice.
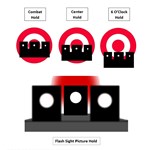
If you’re rolling your eyes and thinking, “How complicated can it be to pull the gun out of the holster?”, you might be surprised to learn that a proper draw consists of five distinct steps—at least the way they teach it at Gunsite Academy (and they know better than anyone!). Here’s how you do it.
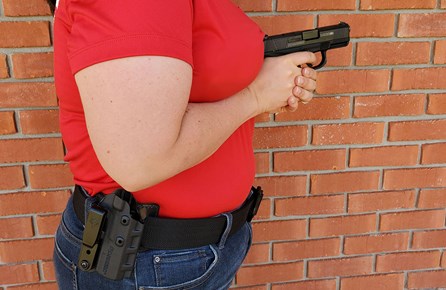
Step 1: Grip
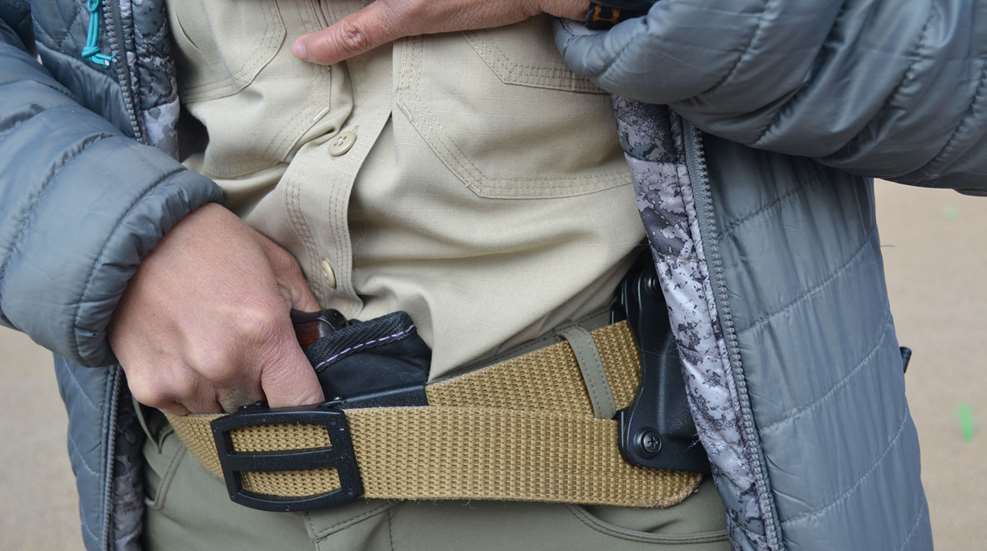
In this first step, your strong hand will move to the gun and establish a firm, proper grip, with your hand high on the pistol’s grip and your fingers wrapped strongly around it, with your trigger finger straight out so it’s in a position to rest high on the frame when you draw. At the same time, your off-side hand (for me, a right-hander, that’s my left hand) has two options. If you are at the range and shooting from an outside-the-waistband holster, your off-side hand should smack open and flat against your chest, a bit lower than armpit height. This serves two purposes: It ensures your hand is not flailing around anywhere where you might accidentally cover it with the muzzle when you draw, and more specifically, it puts your hand in a perfect spot to accomplish an upcoming step we’re about to learn.
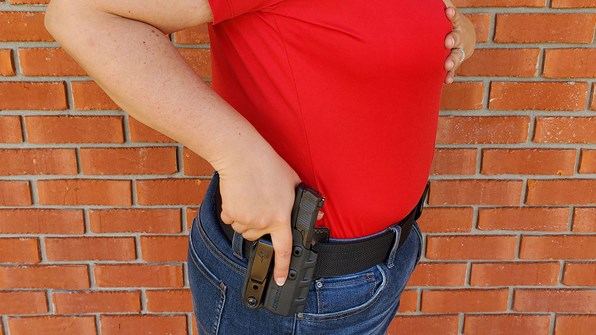
If you are carrying concealed, your support hand might be needed to help sweep or lift your cover garment out of the way so your strong hand can access the grip of the gun. Practice this at home with an unloaded firearm and various types of cover garments and layers. When your support hand has done its job and your strong hand is on the grip unhindered by your clothing, bring the support hand to that flat, open position on your chest.
![]()
Step 2: Clear
In the second step, your support hand stays exactly where it is and you lift the gun straight up out of the holster, keeping it pointed down. Try to keep your elbow pointed back. When this step is completed properly, your support hand will still be exactly where you planted it in step one, and your strong hand will have a firm firing grip on the gun and be holding it above the holster with the muzzle well clear, pointed down.
Step 3: Rotate
Keeping the gun at the same height, bring your elbow down and rotate the gun so it is pointed at the threat, keeping it tight to your side (it’ll probably be at about breast height). If your gun is equipped with a thumb safety, disengage it during this step, but keep your finger out of the trigger guard. The reason you want to keep the gun close to your side is that this is a strong retention position—it would be difficult for someone to knock or grab the gun out of your hands. If you are grappling with an up-close attacker or have another reason why you can’t or don’t want to extend your arms into a full, proper firing posture, you could shoot one-handed from this position if you needed to. For this reason, when you rotate, you want the muzzle pointed at the threat as best you can, which probably means angled slightly upward.
After this step (in practice), pause and check two things. One, is the muzzle pointed at the target—for practice purposes, pointed at about chest-height on a human-shaped target? And two, are the gun and the support hand at approximately the same height? If they’re not, you’ll want to adjust where you place your support hand the next time you go through step one. It will take a little practice before getting the muzzle pointed at the right place, but getting both hands at the same height will become intuitive.
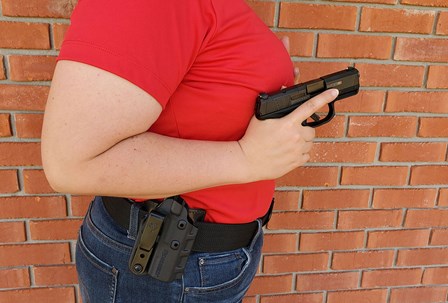
Step 4: Smack
Now that your hands are at the same height, you’ll slide (smack) them together, still tight against the body, and obtain a good firing grip on the gun with both hands. You’ll be holding the gun somewhere in the center of your chest, with a solid two-handed firing grip, pointed at the target, with your elbows locked against your sides and the gun pulled tightly back into your chest for retention. At the same time, bring your finger onto the trigger but do not start pulling unless you are out of time and you must shoot the threat immediately from this position.
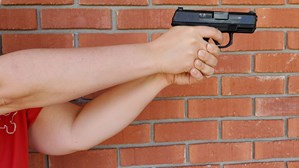
Step 5: Look/Present
If you’ve done the steps properly up to this point, you should have a proper firing grip on the gun so you don’t need to fiddle around or move it in your hands when you’re ready to shoot. In step five, you’ll extend the gun out to your chosen shooting stance/position. Look at the target so you’re able to bring the gun right up into the correct line of sight. As you do so, begin taking any slack out of the trigger so that you can complete the trigger pull immediately once your sights are aligned.
Learning to move your arms while simultaneously taking just the right amount of slack out of your trigger is going to take some practice. You can and should do this while dry-firing at home, but at the range, it’s still safe to practice this way, because the muzzle remains pointed at the target the entire time, beginning in step three.
Smoothing It Out; Reholstering
When you first start drawing this way, it will feel slow and clunky, because you’ll be thinking about and performing the five distinct steps individually. The more you do it, the smoother and faster it becomes until it’s one continuous motion. Be careful, however, that you don’t get sloppy with that support hand as you speed up. It’s very tempting to try to gain a bit of time by combining steps three, four and five, but avoid that mistake. It will leave your support hand and your gun hand moving toward the same place somewhere in the air with nothing to anchor against—and if one hand gets there faster than the other, not only have you not saved any time, but you might have muzzled yourself in the process.
When you are done shooting and it’s time to reholster, work the steps in reverse, including bringing your support hand back to your chest so it is always anchored in a safe place. Reholster slowly so you have time to notice any resistance. If you do, immediately stop—don’t try to shove the gun in the holster, because your shirt or something else might be in the way, and that could potentially make contact with the trigger. There’s never a reason you’ll need to reholster with urgency, so take your time.