Hitting a moving target with a shotgun successfully and consistently requires proper technique, and proper technique is dependent upon a proper mount. Learning to mount the gun the same way every time is a vital skill you must master if you hope to be a good wingshooter or clay shooter. You can practice this at home using an unloaded shotgun and a flashlight, using a technique popularized by Gil and Vicki Ash of OSP Shooting School. OSP claims that doing this twice a day for 5 to 10 minutes for 21 days in a row will improve your hit percentage by 35 percent to 50 percent, and although I’ve never kept track of my percentage to test those numbers, I have found this drill immensely helpful when I dedicate the time to actually doing it.
The flashlight drill is actually two separate drills: One to perfect your mount and one to perfect your swing and sight picture.
What You’ll Need
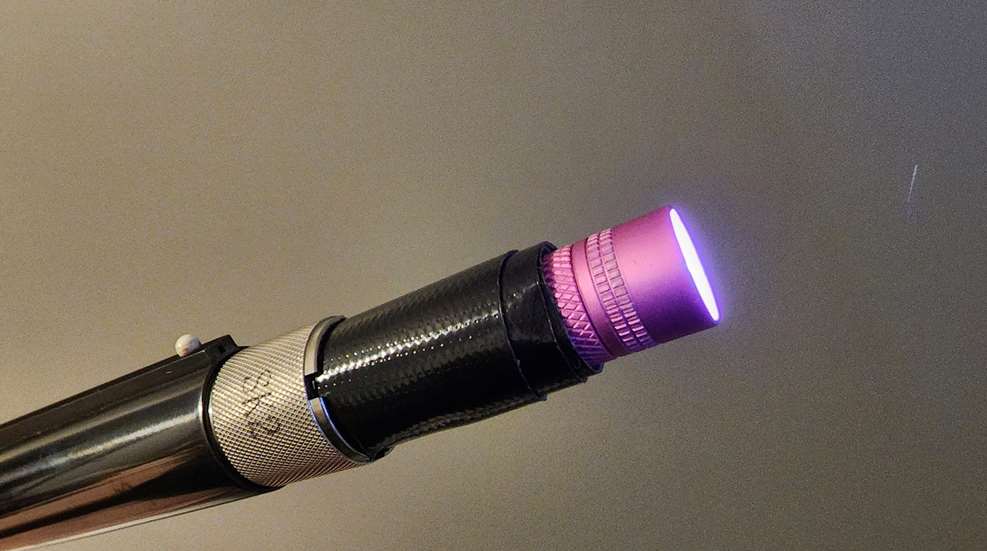
First, take your shotgun and double-check that it is unloaded. Next, you’ll need a small flashlight that fits in the muzzle. The Mini Maglite is perfect for this, but any small light that fits in the muzzle will work. For these photos, I’ve wrapped duct tape around a little flashlight until it fits nicely in the muzzle of my 12-gauge. You want the flashlight to fit snugly enough that it won’t fall out easily and certainly won’t slide down into the barrel and need to be pushed out. The purpose of this is to create a beam of light that points where your gun is pointing. When you’ve got the right fit, turn the flashlight on and insert it into the muzzle of the unloaded gun.
Drill #1: Perfecting the Mount
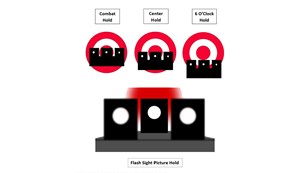
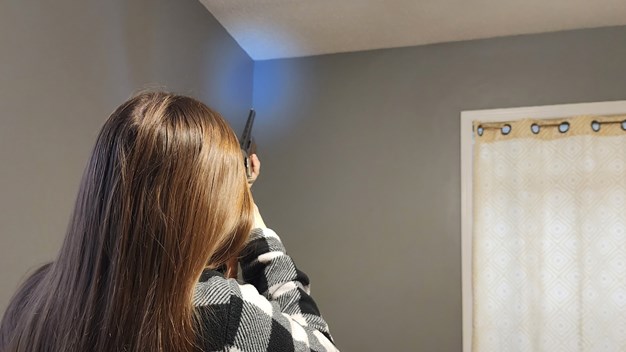
Stand in any room of your house that has a level ceiling (not vaulted). You can turn the lights down or off if it helps you see the beam of the flashlight better. Adopt a comfortable shooting stance and hold the gun in a natural unmounted position, with the beam of light pointing directly into a corner where two walls meet the ceiling. Slowly mount the gun to your face as if to shoot, keeping the light pointing in the corner. The light should not move when you’re mounting correctly.
When you start doing this, especially if you are relatively new to shotgunning, the light will bounce all over the place, particularly up and down. This is a signal that your left hand and your right are each doing their own thing rather than working together; one is moving faster than the other or trying to do more than its share of the work. Try it again and focus on keeping the light in the same spot without moving it. Go as slow as you need to in order to keep the light focused in the corner as the gun moves. You will be pushing the gun slightly out away from your body as it comes up, then touching it to your cheek and shoulder at the same time—the cheek being the vital part, believe it or not. Do not snug the gun into your shoulder and then cinch your face down to the stock, because this will result in a slightly different mounting position every time, which results in inconsistent shooting.
Repeat this mounting drill for five to 10 minutes at a time, keeping the light steadily pointing in the corner of the room, speeding up as you are able.
Drill 2: Perfecting the Swing
The previous drill got your mount in good shape, but it’s also a good move to use when you’re shooting a going-away target, because there’s little to no swing involved. But on a bird or clay target that is flying from left to right or right to left, you’ll need to practice your crossing move, and it is most effective and efficient to make the swing and the mount at the same time. That’s what this drill is for.
Instead of keeping the beam in one place while you mount the gun, for this drill, you’ll be moving the beam along the wall/ceiling seam as you mount. Start with the beam in the corner and imagine that you want to hit the bird or break the target at the end of that wall (the next corner). Slowly mount the gun while you move the light across the ceiling seam toward the other corner, keeping the beam moving horizontally but not vertically. It should not dip below onto the wall or jump up onto the ceiling—you are looking for a long, straight move that follows the seam smoothly. The mount should be completed and the gun should touch your cheek right as you are arriving at the opposite corner.
Again, go as slowly as you need to, and be sure you are rotating your entire upper body from the waist or even the legs—not just pushing your arms and turning your head. Do not mount the gun to your face and then begin tracing the line. The goal is for the horizontal swing and the mount to happen simultaneously and finish just at the point where you want to hit the bird.
You should practice this drill in the opposite direction, too, so you get used to shooting left-to-right and right-to-left targets.
For both drills, it is important that you do not look at the gun at any point. This is paramount to good shotgun shooting—you need to learn to mount the gun without peeking at the bead to make sure you’re mounted correctly. You should only be looking at the target, or in this case, the beam of light that represents the target. The gun remains in your peripheral vision, but you do not focus on it at any time. When you switch your focus to the front bead, your brain immediately starts trying to measure lead, and because no one can calculate that fast with their conscious mind, you’ll end up behind the bird. Do not let yourself get into the bead-peeking habit!
One final tip: If your gun does not fit you, you will not be able to mount it as ideally as possible. You also can’t get a good gun fit without a halfway decent and consistent gun mount, so this is a bit of a chicken-and-egg scenario, but I recommend you get your gun fitted as soon as you are able in order to make the most of these drills.
To see what this looks like, the National Shooting Sports Foundation has an excellent video of Gil and Vicki demonstrating the Flashlight Drill.